In this article, we will show you how to install Pint Footpads on a Onewheel Pint. This is a relatively simple process that can be done in about 30 minutes.
What you will need:
- Pint Footpad Tool
- Torx T20 – Star hex tool
Instructions
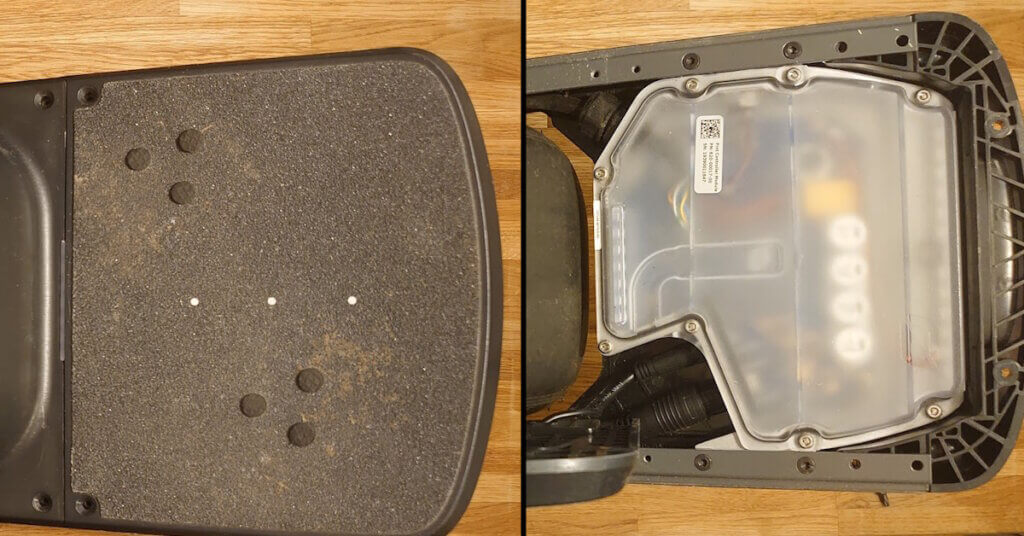
There is a slight difference between installing the front and back footpad as the front one has the pressure sensor that need to be connected to the main controller.
How to change the back footpad:
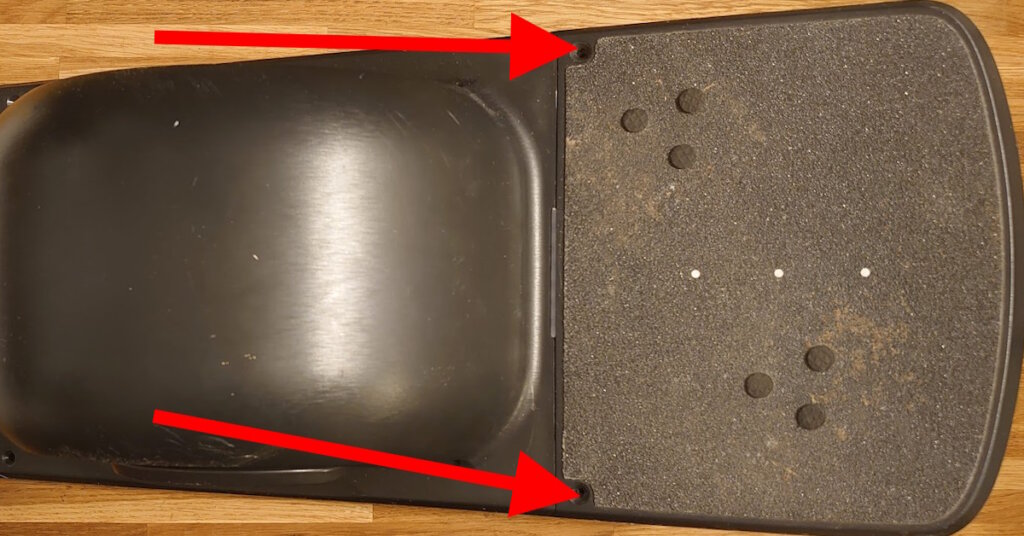
- Start by removing the six screws from the back footpad. There are four on the bottom and two on the top.
- Flip the footpad over and remove the footpad. *There is nothing to disconnect or do
- Place the new footpad on the board and align the holes.
- Screw in the two top screws, but don’t tighten them all the way yet.
- Flip the board over and screw in the four on the underside.
- Tighten all the six screws on the back footpad.
How to change the front footpad:
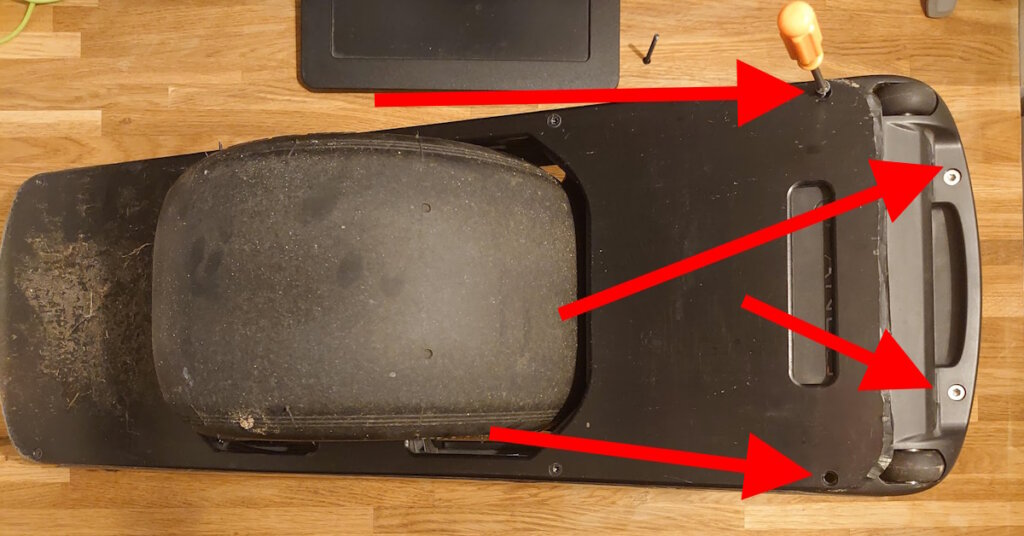
- Start by removing the four bottom screws from the underside of the footpad.
- Flip the footpad over and remove the two top screws.
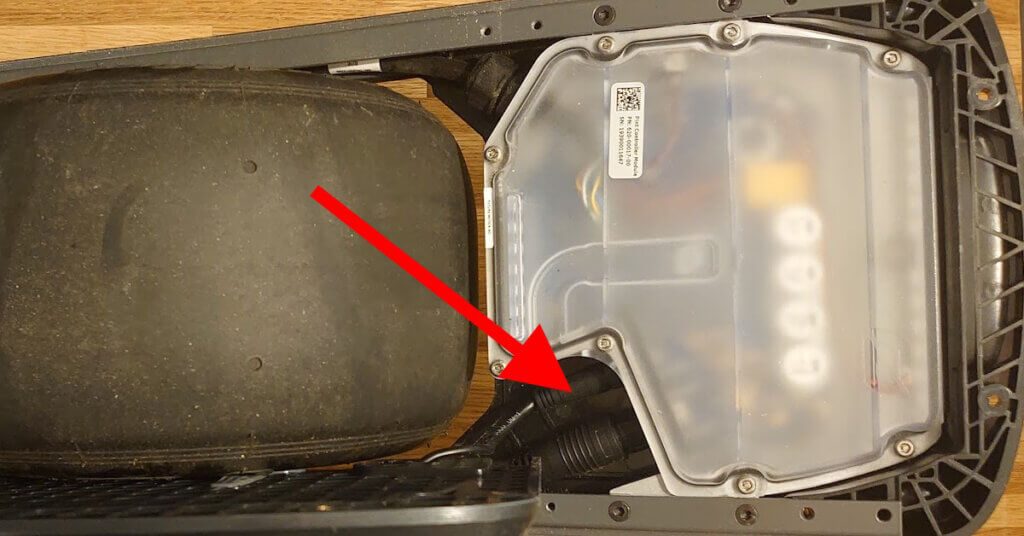
- Lift the footpad and rest it on the Onewheel tire to allow you to safely disconnect the footpad connector. *Use the included tool to not damage the sensor cable
- Place the new footpad on the board, resting on the tire, and align the cable. *The notch and arrow on the cable should be pointing upwards when installing.
- Screw in the connector with the tool and tighten it securely.
- Screw in the two top screws, but don’t tighten them all the way yet.
- Flip the board over and screw in the rest.
- Tighten the six screws on the front footpad.
- Test the footpads by turning on your board and making sure the sense pads are working.
Tips:
- It is helpful to keep all of the screws loose until you have all of them started, then tighten them one at a time.
- Be careful not to overtighten the screws, as this can strip the threads.
- If you are having trouble connecting the footpad connector, make sure that the arrow on the connector is aligned with the notch on the footpad.
We hope this article has helped you install your new Pint Footpads!
Additional tips:
- When installing the new footpad, it’s recommended to only screw in the screws a touch, rather than all the way. This is because if you tighten just these two screws and then flip the board over to mount all the other screws, it might be shifted off a little bit from the screw holes. To avoid this issue, keep all the screws fairly loose when installing and then sequence them around.
- You can also find many helpful tips and tricks for riding your Onewheel Pint online or in your local Onewheel community.
- Changing the footpad to an upgraded one like the new Pint (X) Flared Footpad will enhance the riding experience of the Onewheel Pint and Pint X, offering more platform, more comfort, and more control