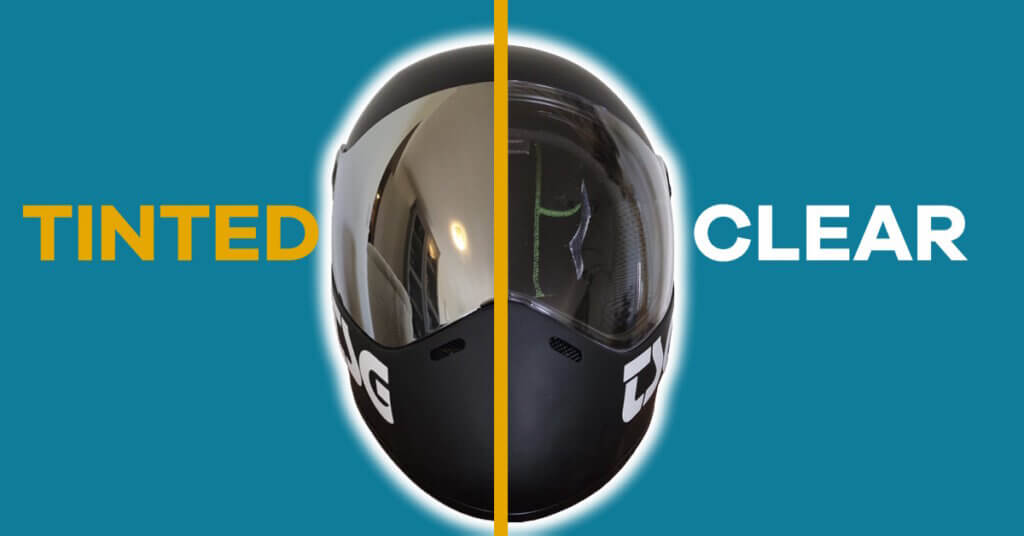
Here is a simple guide on how to change the visor on your TSG Pass Pro or normal TSG Pass helmet. By following these easy steps, you’ll have your other visor installed in no time, ensuring clear vision or tinted film to protect you during your rides.
If you don’t want to read, follow the YouTube guide below. [TSG Pass Pro: How to change the Visor Youtube]
How to Change the Visor
Step 1: Gather the Required Tools
To begin, make sure you have the necessary tools for the task. You’ll need a flathead screwdriver. It is recommended to use an eight-millimetre flathead screwdriver to prevent any scratches on the screws. While other tools may work, it’s best to have the right tool for the job.
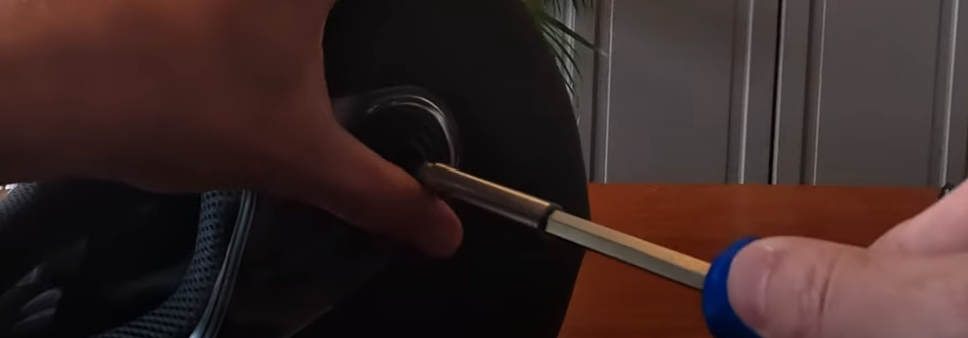
Step 2: Unscrew the Visor
Start by locating the screws on both sides of the visor. Using the flathead screwdriver, carefully unscrew the screws on the right side. Take care not to slip while doing this to avoid any damage. Repeat the same process for the screws on the left side. Once you unscrew all the screws, you can remove the old visor.
Step 3: Prepare the New Visor
Now that you have removed the old visor, take a moment to inspect the helmet and clean any dirt or debris that may have accumulated. This will ensure a clean surface for the new visor installation reducing the risks of scratches when moving it up and down.
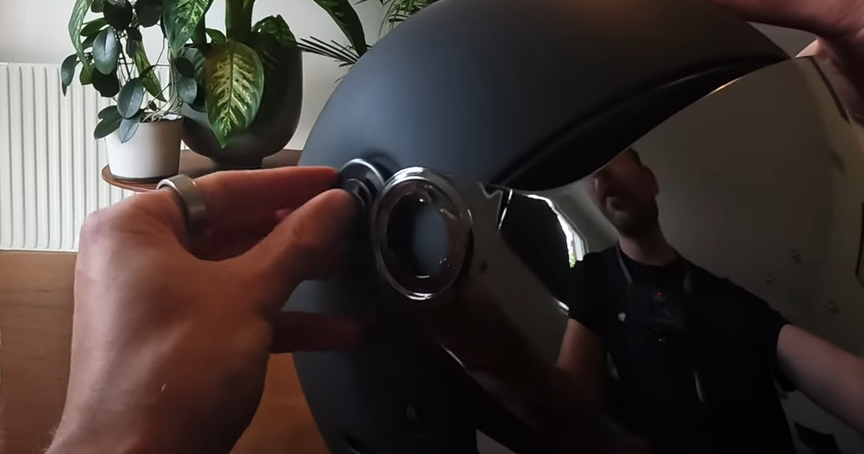
Step 4: Attach the New Visor
Take the new visor and mounting plate and align it with the visor mounting holes on the helmet. Carefully insert the visor and plate into the holes, making sure it fits securely. Push gently until you hear a click, indicating that the visor is in place.
Note: If you want the mounting plate to be more secure then you can use double-sided tape to secure it to the helmet. This will make the process more easy as it tend to fall out.
Step 5: Secure the Visor
Once the new visor is properly attached, it’s time to secure it in place. Start by taking the holding plate and screw it in by hand to get it going. Then, using the flathead screwdriver, tighten the screws on both sides to ensure a snug fit. Be careful not to overtighten the screws, as it may cause damage.
Step 6: Final Check
After tightening the screws, double-check that the visor is securely in place. Gently move it up and down to ensure it moves correctly and doesn’t wiggle.
You have successfully changed the visor on your TSG Pass Pro helmet.
The End
As you can see, changing the visor on your TSG Pass Pro or TSG Pass helmet is a relatively simple process. Following these step-by-step instructions and using the appropriate tools, you can easily replace the visor and maintain optimal visibility and protection during your rides. Remember to handle the screws with care, align the visor properly, and ensure a secure fit before heading out. Enjoy your rides and stay safe!